The Phase Genomics platform website (https://platform.phasegenomics.com) offers powerful capabilities to combine data from our Hi-C kits with other metagenomic data, delivering rich biological insights by leveraging the chromatin structure information of Hi-C.
In addition to delivering more high-quality genomes than any other method, ProxiMeta offers the unique capability to perform host attribution for plasmids, viruses, AMR genes, and other mobile elements with no additional special experimental requirements.
This page will show you how to use the Phase Genomics platform website.
Table of Contents
- Table of Contents
- 1 Create an Account
- 2 Uploading a File
- 3 Starting a Sample Analysis
- 4 File Type Guidelines
1 Create an Account
To begin using the Phase Genomics platform, you need to create an account. To do that, go to the Phase Genomics platform website https://platform.phasegenomics.com and click the “Welcome” button [A] in the top right of the page, then select “Register” [B] from the dropdown.
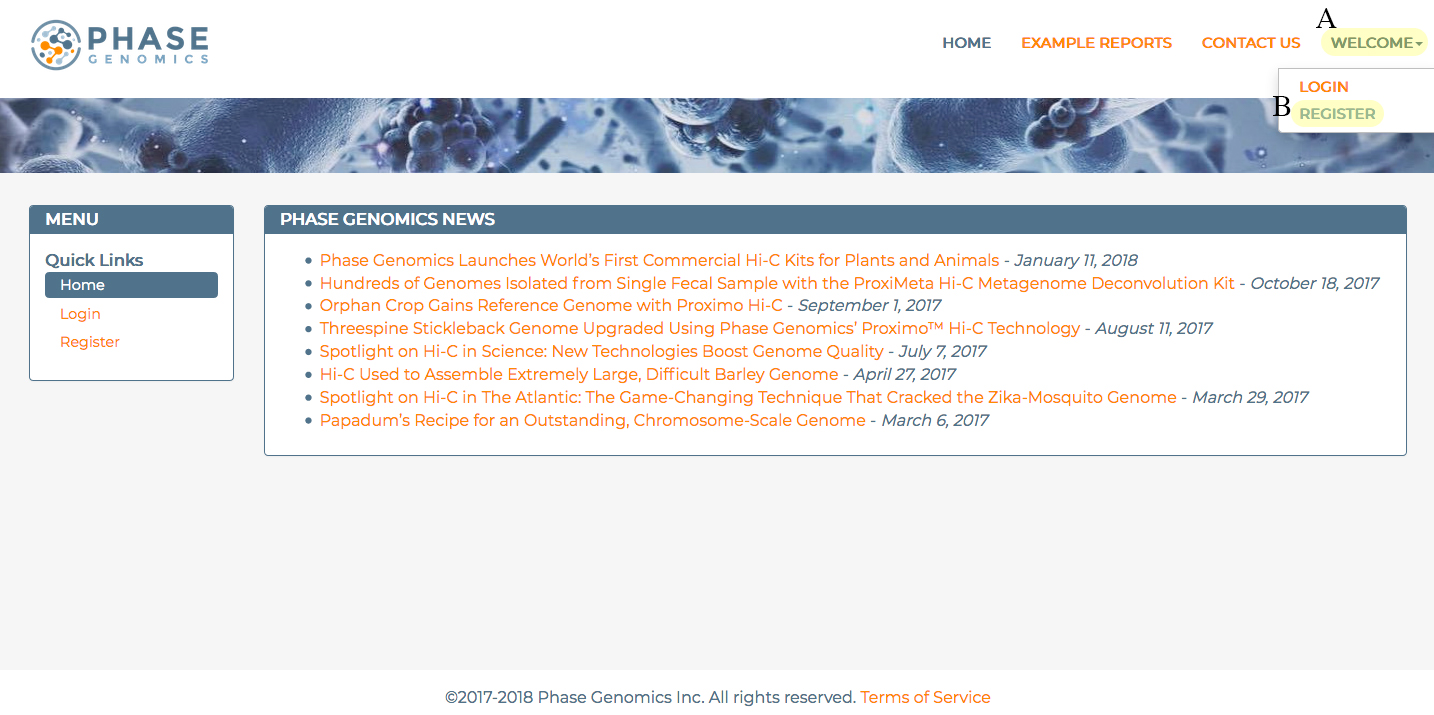
Figure 1.1 Creating an account on the Phase Genomics platform.
This will take you to the Account Registration page, where you can enter the information for your account [A]. Note that the “Organization Code” field is optional. Organization Codes are 6-digit alphanumeric codes. If you have been given an Organization Code by someone else in your organization (your lab, team, company, etc.), entering the Organization Code here will automatically request your account to join that Organization when it is created. You can always join an Organization later if you don’t have a code when you create your account. Once you have entered all your account info, click the Register button [B] to submit your information.
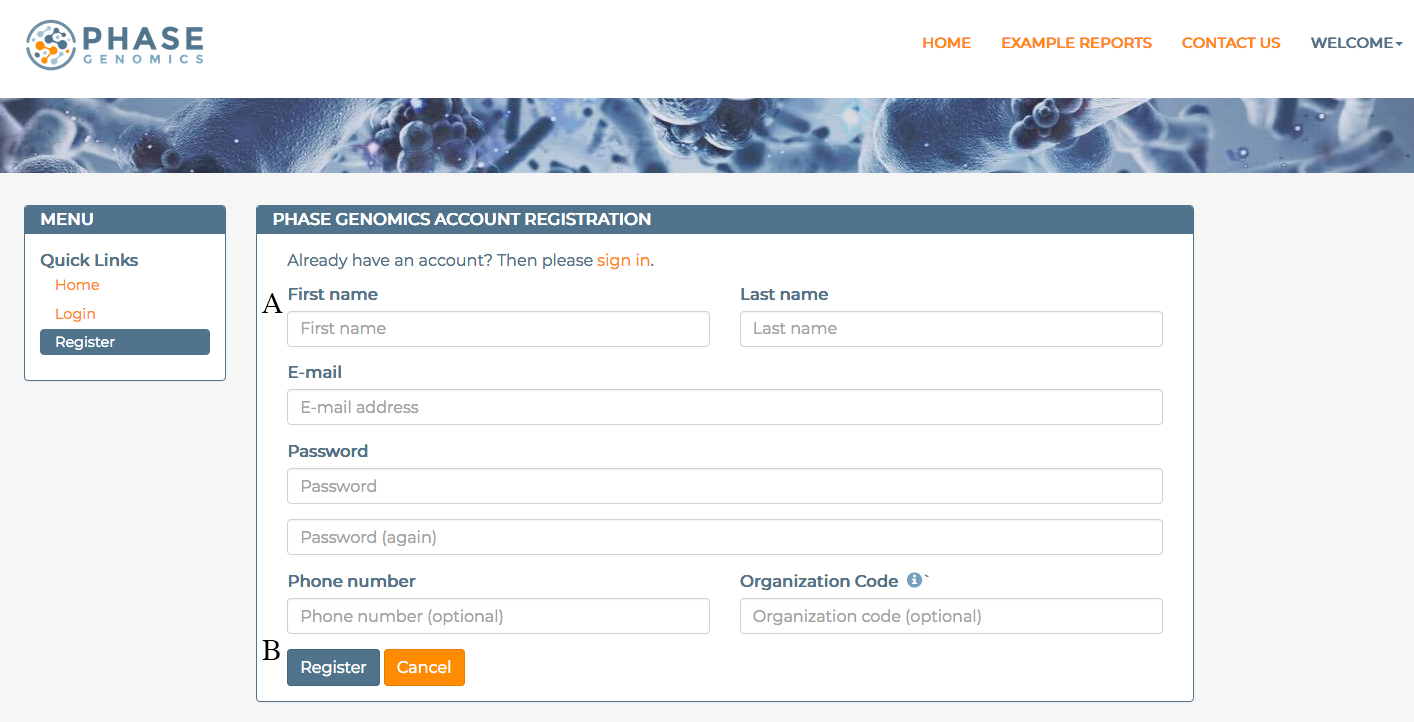
Figure 1.2 Entering account information on the Account Registration page.
Our Terms of Service will appear after you click the Register button. Please read these terms and click “Accept” to accept the terms, or “Decline” to refuse them. To accept the terms, you must read and scroll all the way to the bottom of the terms. If you click Decline, you will be taken back to the Account Registration page. Note that acceptance of the Terms of Service is required to be able to upload data to the Phase Genomics platform and to be able to utilize the bioinformatics capabilities of the platform.
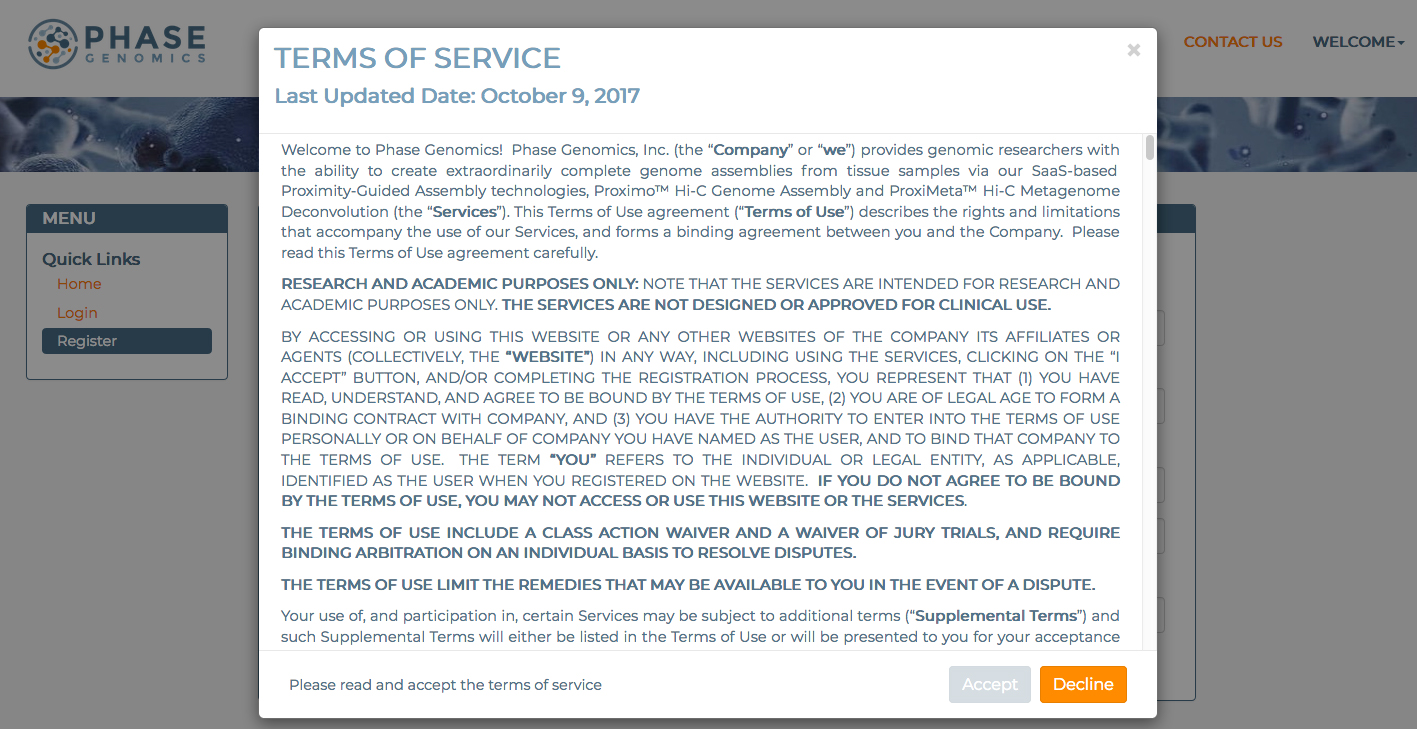
Figure 1.3 The Terms of Service screen.
If you accept the Terms of Service, you will be sent a confirmation email to verify your email address and will be taken to a page confirming we have received your information. If you do not receive this email, check your Spam folder. If you still cannot find it, contact us at support@phasegenomics.com for help.
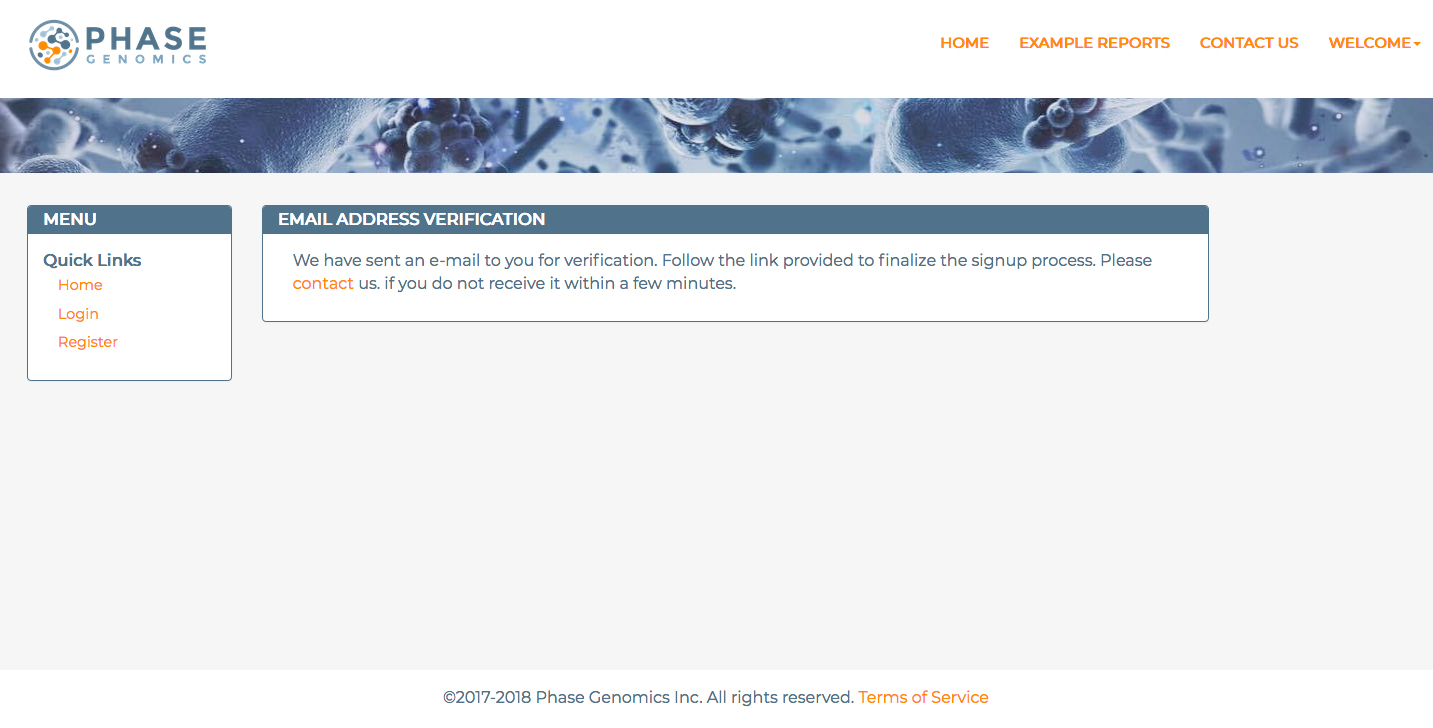
Figure 1.4 The Email Address Verification screen.
Once you have confirmed your email, you should now be able to log in and access your account on the platform, as well as any data or results shared with your Organization (provided your Organization administrator has approved your request to join the Organizaiton).
2 Uploading a File
You may upload files to your account at any time and access them later for analysis. This can be useful if you have some files for you project ready now, but are still waiting for others to be ready (e.g., to return from sequencing), to save time uploading later when you are ready to perform an analysis. It can also be helpful if you have files you would like to add to your account but are not directly needed for processing a sample, or if you are experiencing connection problems when uploading batches of files as part of Sample creation.
To upload a file, log into your account and click the “Upload Files” link [A] in the left navigation of the page.
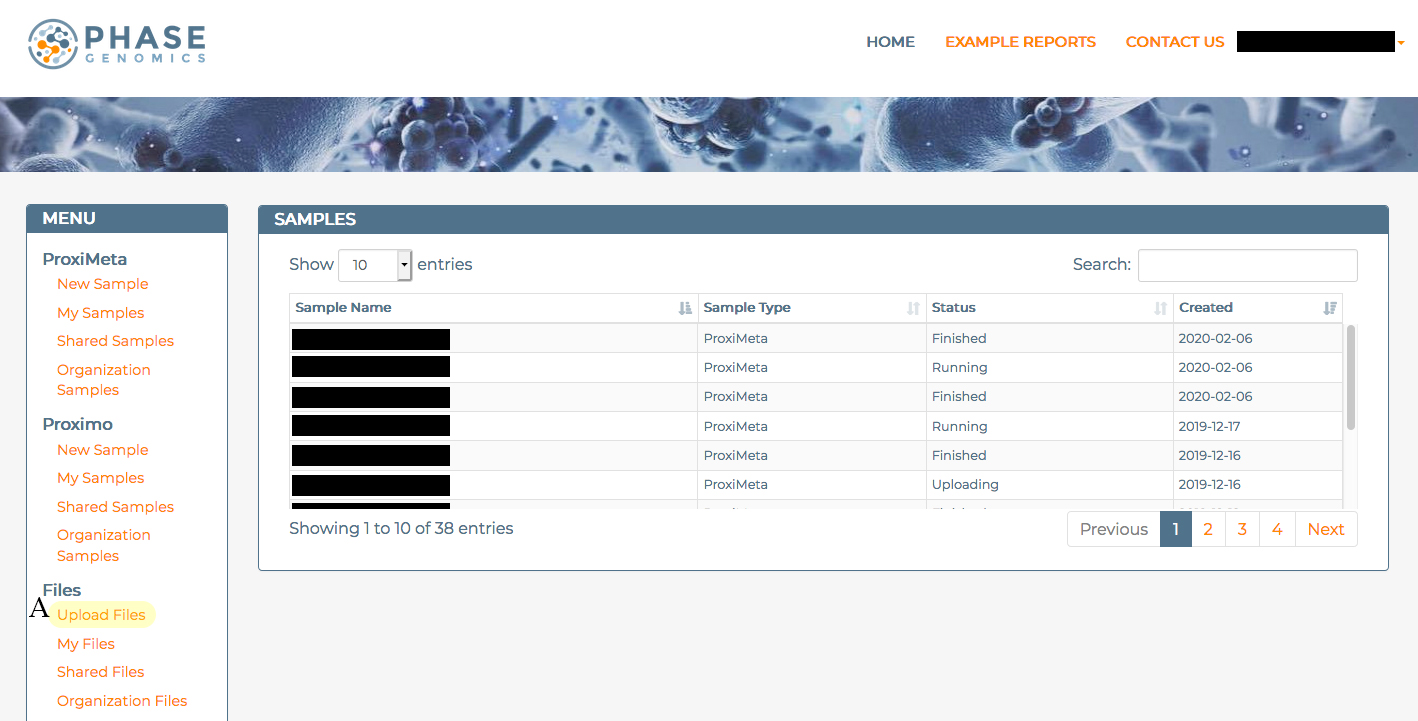
Figure 2.1 Navigating to the Upload Files link.
This will open a popup dialog for you to enter upload information for one or more files.
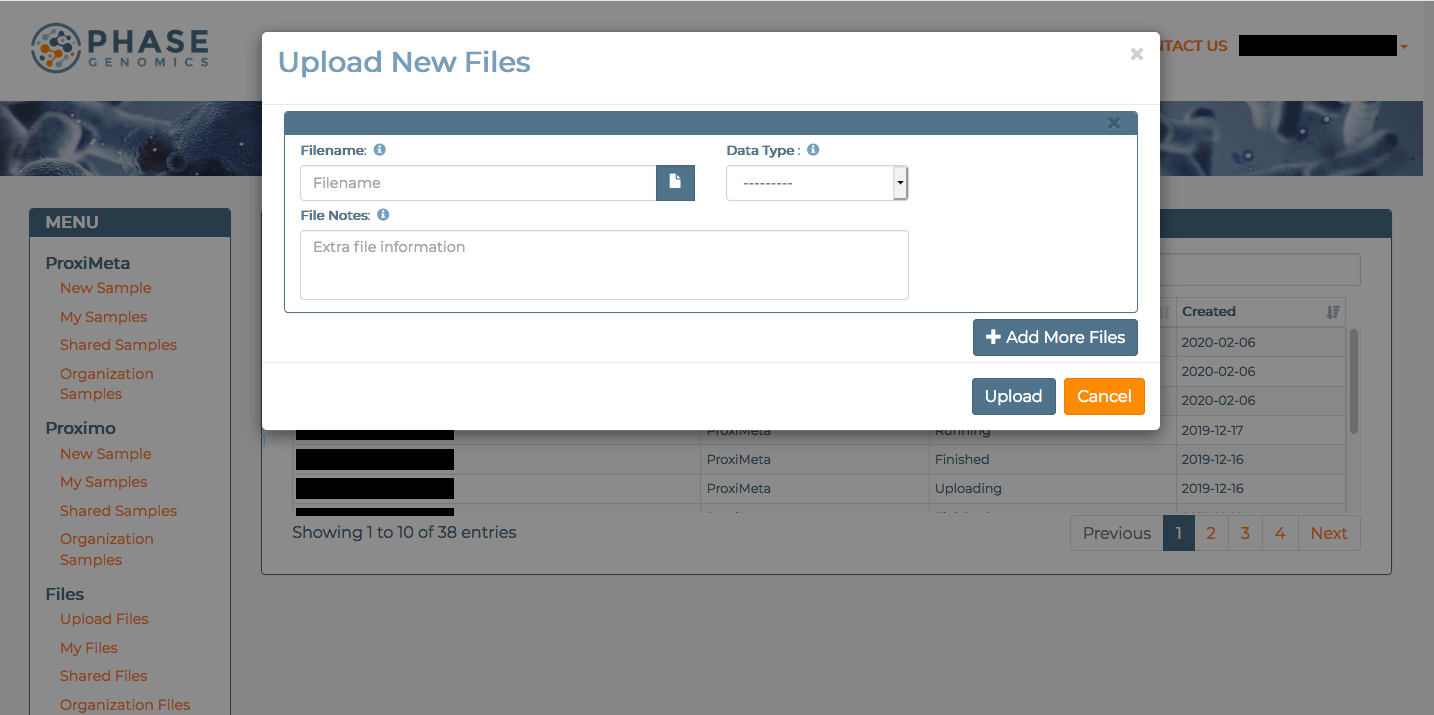
Figure 2.2 The Upload Files dialog.
In the Upload Files dialog, you may enter the path to the file you wish to upload from your computer [A] or click the File Browser button [B] to open and navigate to the file on your computer. For every file you upload to the plaform, you must also indicate what type of file it is to the platform in the Data Type dropdown [C], following the File Type Guidelines. You may also add notes to files [D] if there is any additional information you want to be annotated along with the file.
You may also upload files in batch using the Add More Files button [E]. A similar file selection section will appear for each additional file you wish to upload. When you are ready to begin the upload, click the Upload button, or click Cancel to close the dialog.
Once files begin uploading, the dialog will be updated with a progress bar indicating how much of the file has successfully been uploaded.
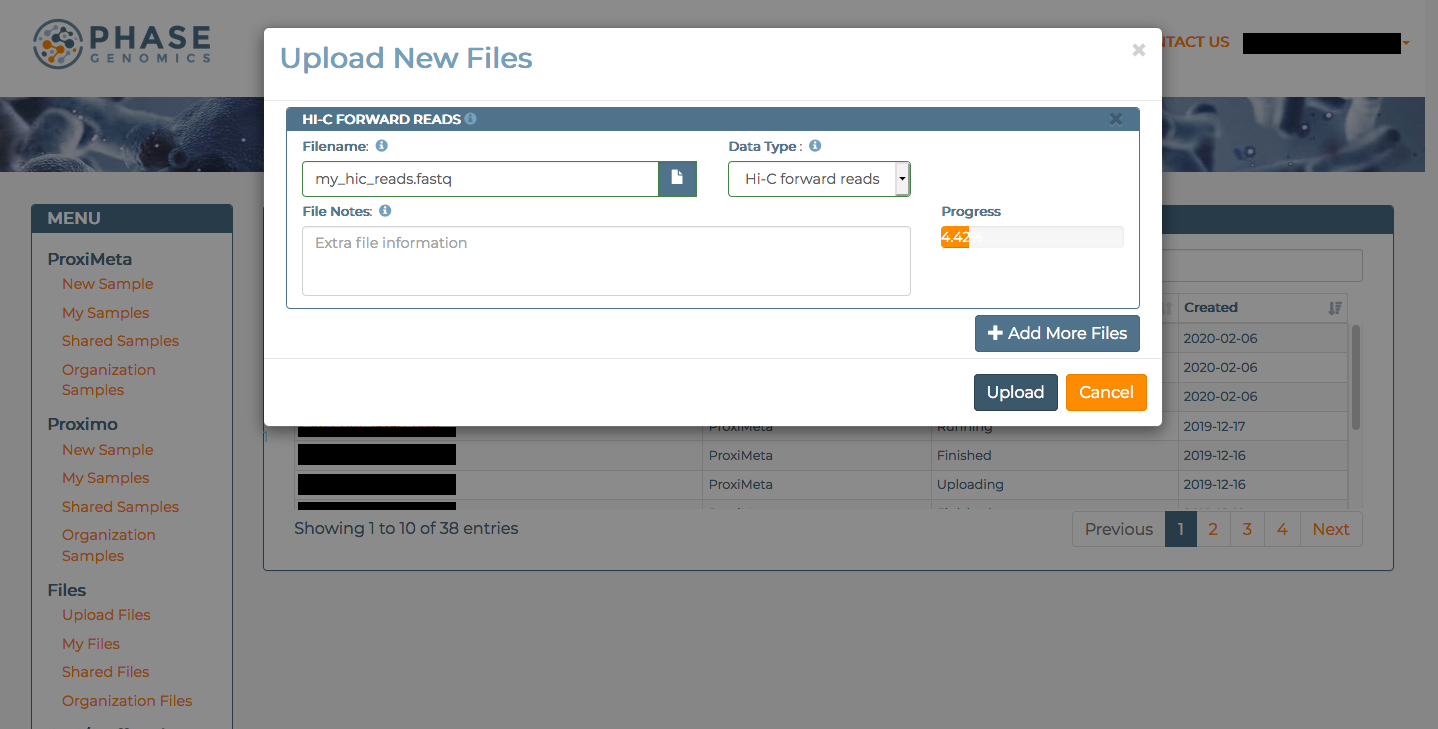
Figure 2.3 The Upload Files dialog, showing progress uploading a file.
Because of the size of genomics data, uploads may take several minutes or even hours to complete uploading depending on your connection. If you wish to abort an upload, you may click the Cancel button. Also, note that closing the webpage or navigating away from it, even if you stay on the Phase Genomics platform, will abort any in progress uploads. If you have any trouble uploading files, contact us at support@phasegenomics.com
Once your upload is complete, the File Upload dialog will disappear, and you should see the file in the My Files portion of the platform.
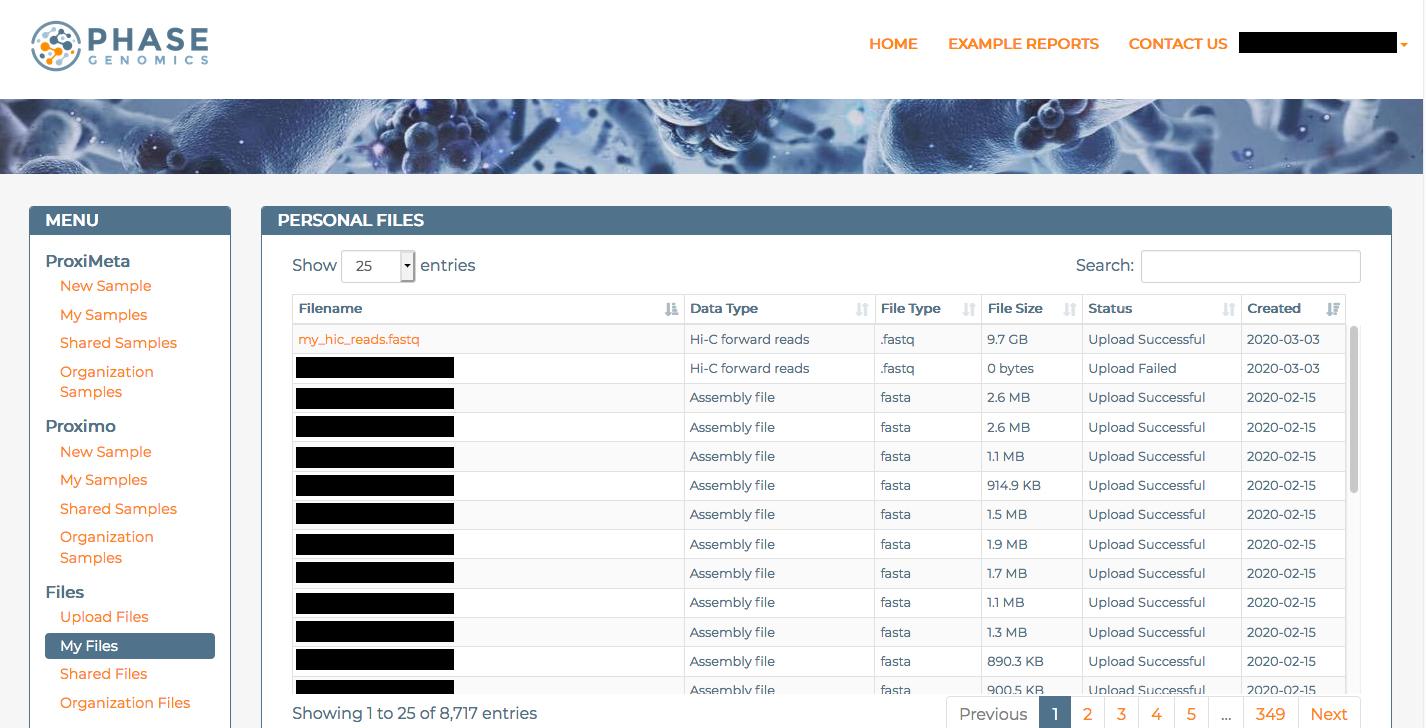
Figure 2.4 Files that have successfully uploaded appear on your account in the My Files page.
3 Starting a Sample Analysis
To initiate a ProxiMeta analysis on the platform, log into your account and click on the “New Sample” link [A] in the left navigation pane, under the ProxiMeta section.
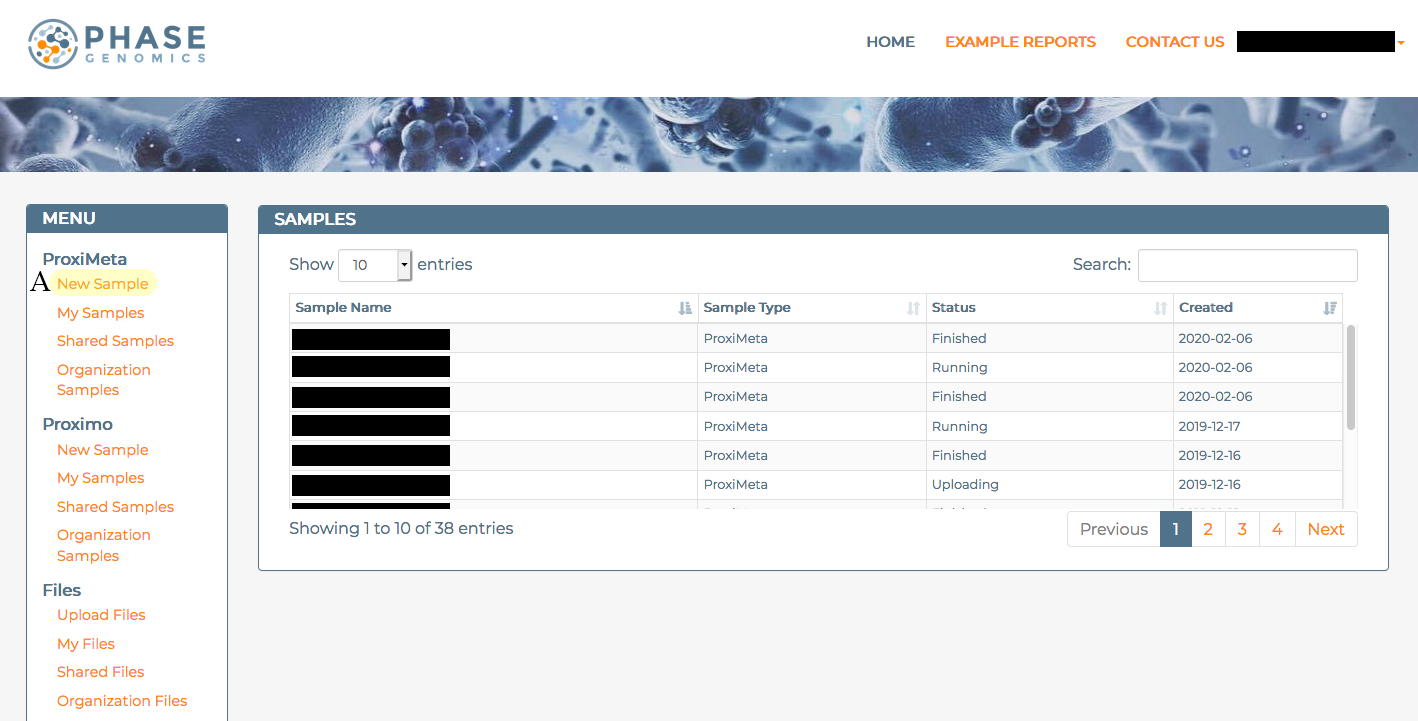
Figure 3.1 Begin a new ProxiMeta sample analysis by clicking the New Sample link under the ProxiMeta section of the left navigation pane.
Clicking the New Sample link opens a dialog to begin the Sample creation process in the platform.
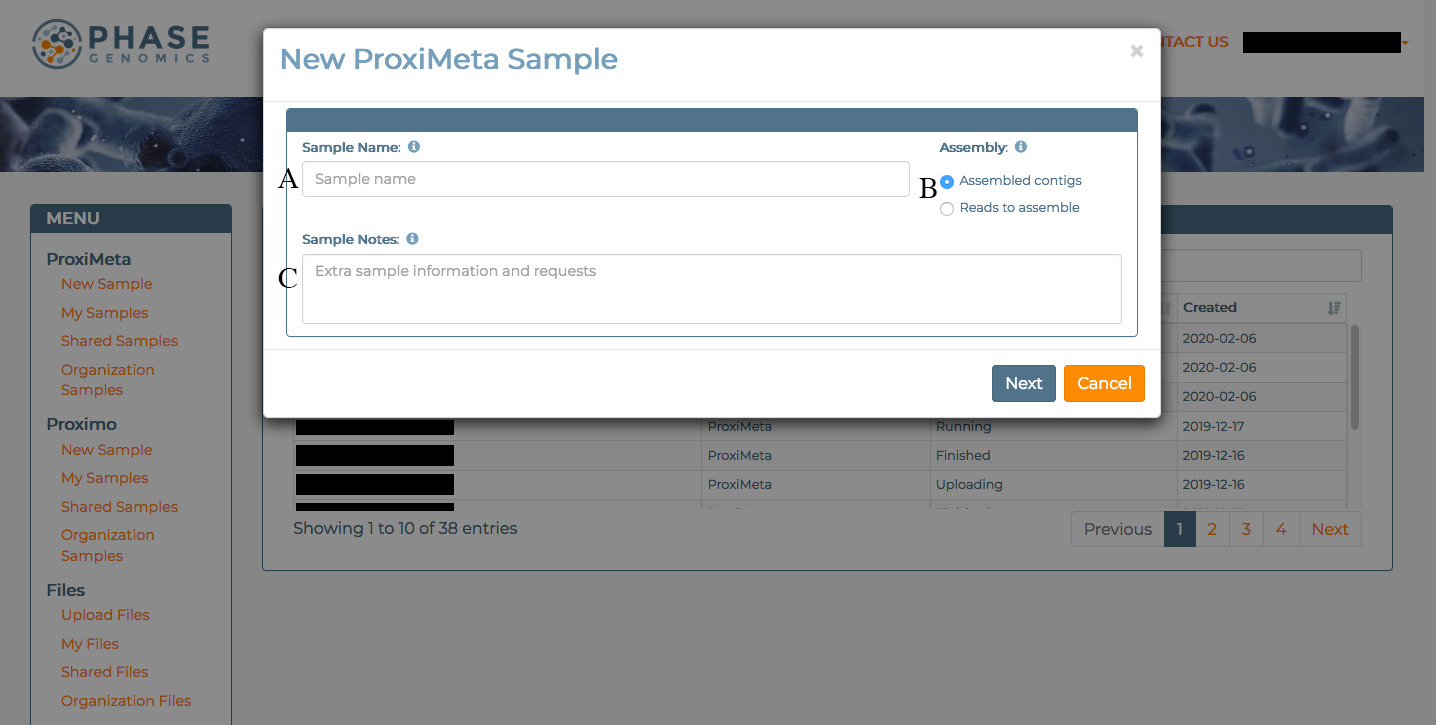
Figure 3.2 The first Sample creation dialog for ProxiMeta.
In this dialog, enter a Sample Name [A] for the Sample. While it is not required, it is recommended that each sample name is unique to help keep track of similar samples, or re-analyses of the same sample. Please note that whitespace characters (e.g., spaces) will be converted to underscores (_) in many parts of the system.
Indicate whether you are uploading a FASTA you have already assembled (“Assembled contigs”) or would like ProxiMeta to perform de novo contig assembly using shotgun reads you will provide (“Reads to assemble”) in the Assembly method selector [B]. You may also add any sample notes you have [C]. Once you have filled out this form, click Next to continue with Sample creation or Cancel if you wish to discontinue Sample creation.
Clicking Next opens the next dialog for Sample Creation in which you indicate which files you wish to use for the sample. If you selected to use “Assembled contigs” and upload contigs you have already assembled, the dialog looks like this:
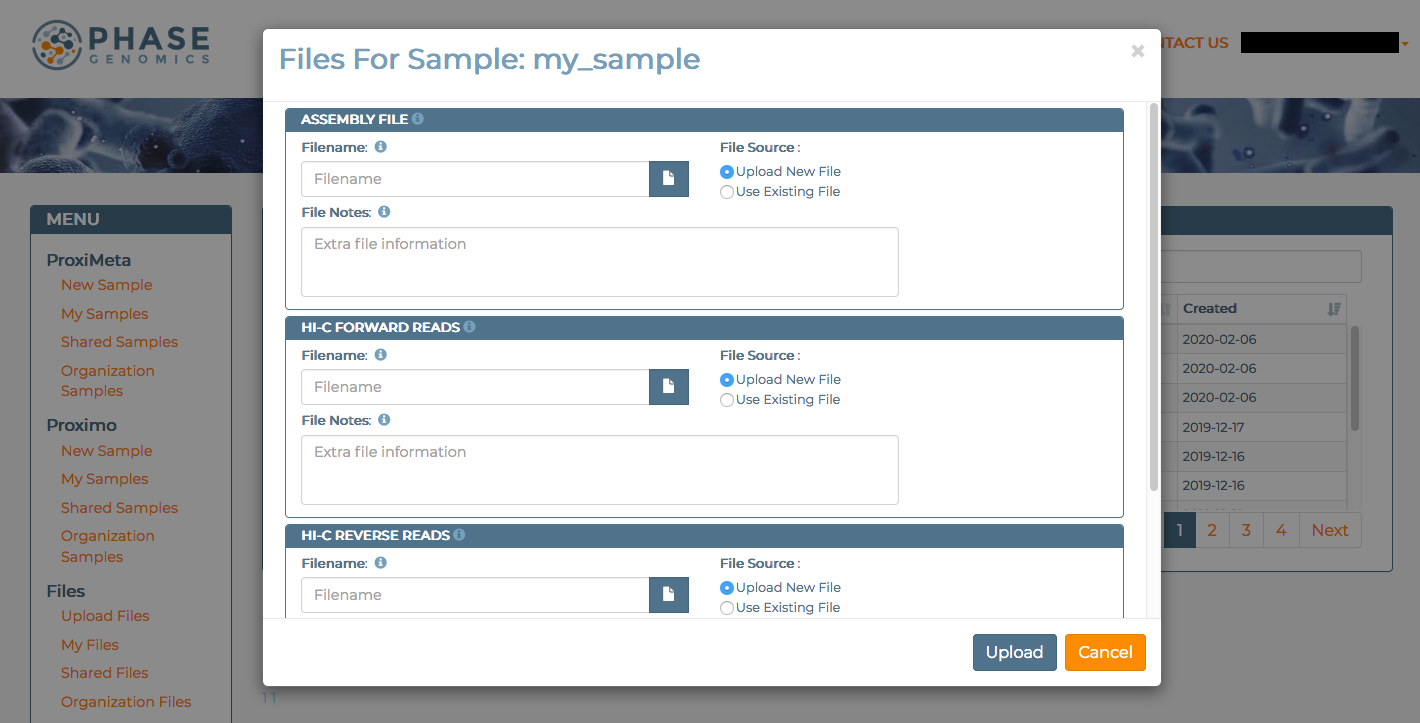
Figure 3.3 The second Sample creation dialog for ProxiMeta when using previously assembled contigs.
If you instead selected to use “Reads to assemble” and have ProxiMeta perform de novo contig assembly (using MEGAHIT), the dialog instead looks like this:
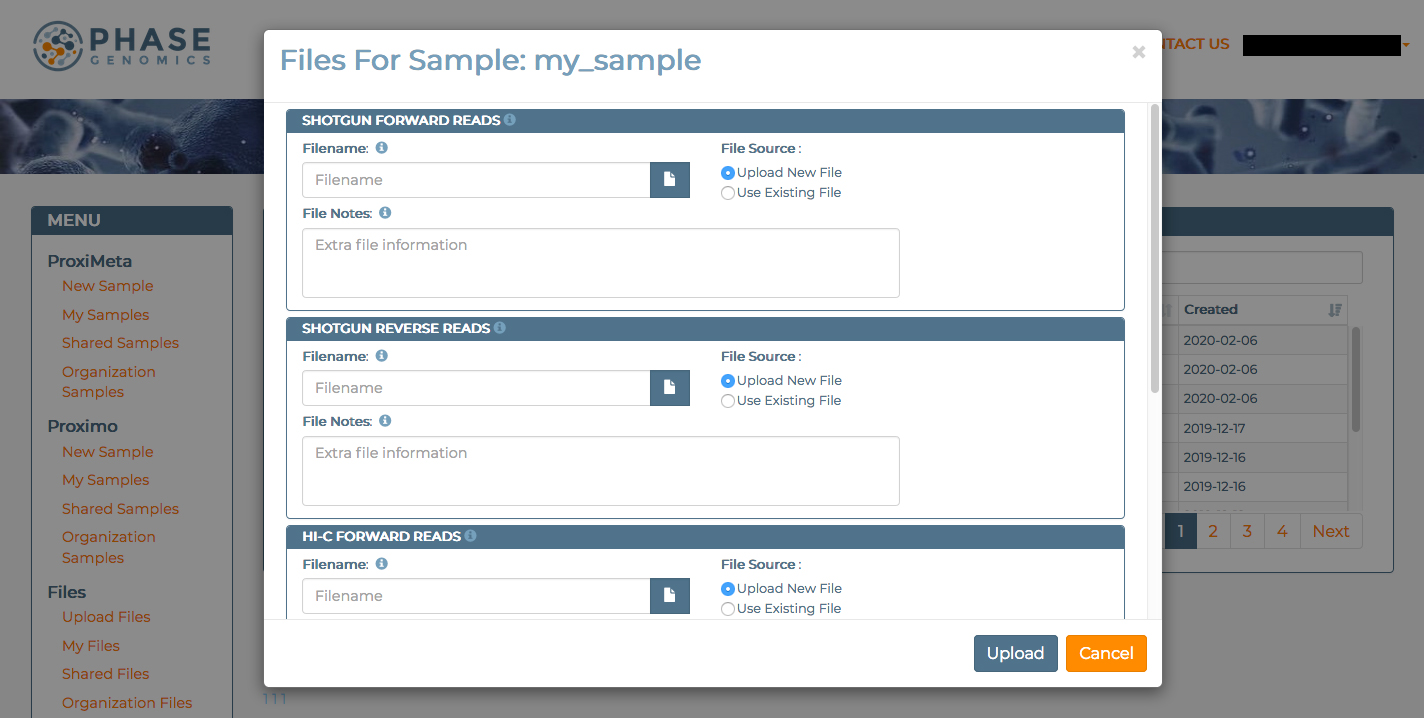
Figure 3.4 The second Sample creation dialog for ProxiMeta when using reads to assemble.
The difference between these two dialogs is what files it would like you to upload in the first File Upload Box or two. When using “Assembled contigs”, the header for the first File Upload Box says “Assembly File”. This Box expects you to provide a FASTA file. When using “Reads to assemble,” the first two Boxes expect you to provide forward and reverse shotgun reads in FASTQ format.
Following these File Upload Boxes are two more File Upload Boxes for the Hi-C forward and reverse files in FASTQ format. The requirements for all files in this dialog follow the File Type Guidelines.
For every file you want to use for a sample, you have the option to “Upload a New File” or to “Use Existing File” in the “File Source” selector in each File Upload Box.
If you wish to upload a new file to the platform, select “Upload a New File.” Then, either type or paste the full path to that file into the “Filename” box [A], or you can click the blue File Browser button [B] to open a browser and navigate to the file.
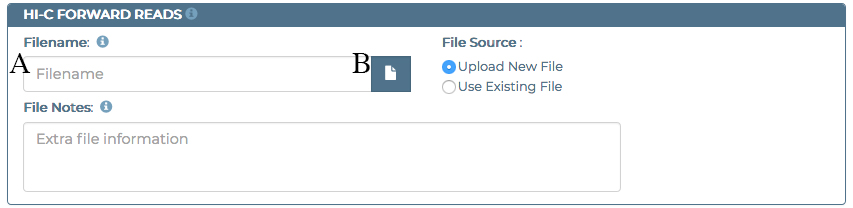
Figure 3.5 Choosing to Upload a New File during Sample Creation.
If you wish to use a file you have already uploaded to the platform, select “Use Existing File” and the “Filename” box [A] will turn into a dropdown showing all files you have uploaded to the platform previously which are of the appropriate type (e.g., only Hi-C forward reads files are shown in the Hi-C Forward Reads File Upload Box).
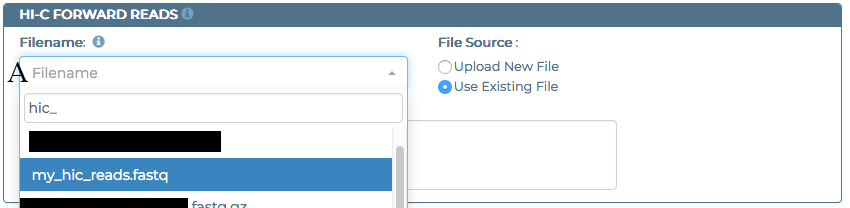
Figure 3.6 Choosing to Use an Existing File during Sample Creation.
Once you have selected all the files you wish to use for the sample, clicking the Upload button will upload any new files you selected and begin running the sample. A progress bar will be shown for any files that are actively being uploaded for the job.

Figure 3.7 Uploading files to begin Sample Analysis.
Because of the size of genomics data, uploads may take several minutes or even hours to complete uploading depending on your connection. If you wish to abort an upload, you may click the Cancel button. Also, note that closing the webpage or navigating away from it, even if you stay on the Phase Genomics platform, will abort any in progress uploads. If you have any trouble uploading files, contact us at support@phasegenomics.com.
Once all data has been uploaded or located on the platform, Sample Analysis will begin. You should receive a confirmation email at the address associated with your account once our system has all the data needed and begins running the job, you should also receive periodic update emails as the analysis progresses. You may check on sample progress by clicking on the sample in the platform which will show you a figure displaying its progress.
Once the analysis is complete, clicking the Sample will take you to the Sample Results Page, which includes reports as well as various downloadable results such as individual genome FASTA files and summary host attribution reports for plasmids/AMR genes/mobile elements. If you have any problems with Sample Analysis appearing to be stalled or need help interpreting results, please contact us at support@phasegenomics.com.
4 File Type Guidelines
To reduce both human and machine errors during analysis, files uploaded to the Phase Genomics platform generally need to include a tag indicating the file type. Files must have one of the following types:
- Hi-C forward reads: Forward reads from a Hi-C library in FASTQ format.
- Hi-C reverse reads: Reverse reads from a Hi-C library in FASTQ format.
- Shotgun forward reads: Forward reads from a shotgun library in FASTQ format.
- Shotgun reverse reads: Reverse reads from a shotgun library in FASTQ format.
- Assembly file: Assembled sequences in FASTA format.
- Other: Any other kind of file.
For uncompressed FASTQ files, the file extension must end in .fastq or .fq. For compressed FASTQ files, the file extension must end in .fastq.gz or .fq.gz. Note that only GZIP compression is supported.
For uncompressed FASTA files, the file extension must end in .fasta or .fa. For compressed FASTA files, the file extension must end in .fasta.gz or .fa.gz. Note that only GZIP compression is supported.